
How to Restore the .htaccess File When Using the All in One WP Security Plugin
Site-wide firewall protection is added for the web site using the .htaccess file. Since the server processes the htaccess file before any other code on the site, it makes sense to put a wall of security up there. This could prevent any malicious attacks from reaching the core web site, plugin, and theme files.
Firewall protection is applied in layers to be sure that it doesn’t tighten the reign too much to prevent the normal functionality of the web site (in terms of the functionality of other plugins, etc). There are basic, intermediate, and advanced settings that can be activated which applies the appropriate commands to the .htaccess file.
The plugin allows for simple backup and restore of the .htaccess file (and wp-config.php file) from within the WordPress dashboard.
Option 1) How to backup and restore the .htaccess file from the “Settings menu” of the All in One WP Security Plugin
It’s very simple to keep a safe copy of your .htaccess file from the WordPress dashboard with this plugin. First, of course is to get the plugin installed through the standard procedure, and I’ll go through those quick steps now. There are a few different ways, here’s one:
1. Download the security plugin to your computer from the WordPress plugin repository. You should now have a zip file called something similar to “all-in-one-wp-security-and-firewall.zip” on your computer.
2. Go to Plugins >> Add New, click Upload, locate the plugin and upload it, activate it, and head to the settings page.
Now, here are the steps to backup the .htaccess file the first time.
1. From the left side menu in the WordPress dashboard near the bottom of the screen, hover over the WP Security menu, and click on Settings if you aren’t already on that page.
On this page you have the options for backing up, restoring, and viewing the contents of the .htaccess file.
2. Click on the .htaccess File tab at the top of the screen.

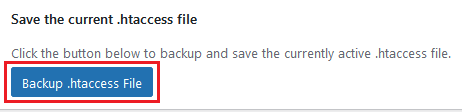
3. Click the Backup .htaccess File button near the top of the page. A file called htaccess_backup.txt will be saved to the root of your web site.
4. In the confirmation message that appears at the top of the page, there will be a hyperlink to the text file that was created that contains the commands from your current .htaccess file. Right-click the link and click Save link as… (or a similar command – it might just be “Save as…”). Find a safe location on your computer to store the file and click the Save button.
Restoring the file is just as simple. Follow the quick steps below:
1. Hover over the WP Security menu, and click on Settings if you aren’t already on that page.
2. Click on the .htaccess File tab at the top of the screen.
3. Click the Select Your htaccess File button, then click Select Files.
4. Locate the backed up “htaccess_backup.txt” file on your computer and double-click it.
5. Scroll down and click the Insert into Post button.
6. Click the Restore .htaccess File button. A message will appear near the top with a confirmation message.
Option 2) How to restore the .htaccess file via FTP
If you were able to successfully backup your WordPress installation’s .htaccess file but can’t gain access to the dashboard to restore the file, you can follow the steps below to do so.
1. First, locate the “htaccess_backup.txt” file on your computer and open it in a text editor.
2. Use the text editor’s File >> Save As… command and make sure Save as type: is set to “All Files (*.*).”
3. In the File name: box type: .htaccess (make certain to include the leading ‘dot’). Then click the Save button.
4. Open up your FTP software and connect to the server that holds the WordPress install files for the site that you want to restore the .htaccess file on.
5. Transfer the “.htaccess” file from your computer to the root folder of the WordPress site. Overwrite the file on the server when prompted.
Option 3) How to wipe out all the firewall rules before uploading the .htaccess file
In the event that you want to remove the firewall rules that were applied to the .htaccess file by the plugin, you can follow the steps below.
If you already have a current backup of the .htaccess file (the “htaccess_backup.txt” file) on your computer, you can follow the steps above to rename it to .htaccess. If you don’t have a current copy then you can login via FTP (or the Control Panel’s File Manager) and download the working copy.
Either way, follow the steps below to modify the .htaccess file and remove the firewall rules:
1. Open the .htaccess file with a text editor. If the file does not have a .txt extension (which it shouldn’t at this point), you may have to open the text editor first and use the File >> Open… command, rather than double-click the file.
2. Locate the “# BEGIN All In One WP Security” and “# END All In One WP Security” lines and remove all lines in between (and including) those lines.
3. Save the file.
4. Upload the file to the server (via FTP or File Manager) and overwrite the existing file.